Tell me; you want your tank to be perfect for your fish, right? And you can’t do that if you have high phosphate levels in the tank.
You’ll also be able to stop sudden algae blooms. Since the algae consume oxygen, your fish might be harmed.
That’s why it’s essential to keep the phosphate level adequate. You can test the phosphate levels of the water with test kits. But which one do you get?
Well, don’t fret. We’ll help you pick the best phosphate test kit. It was a pleasure to go through around 30 kits and pick the top five, so you don’t have to.
That’s not all! We’ve also included a buying guide at the end of the article to help you out further. So let’s dive right in without further ado!
Comparison Table
| Image | Title | Number of Tests | Click to Edit | Buy |
|---|---|---|---|---|
 Top
Top Top
Top | Hanna Instruments HI736 Phosphorus Checker | 6 tests | 0-200 ppb | Buy Now |
 Top
Top Top
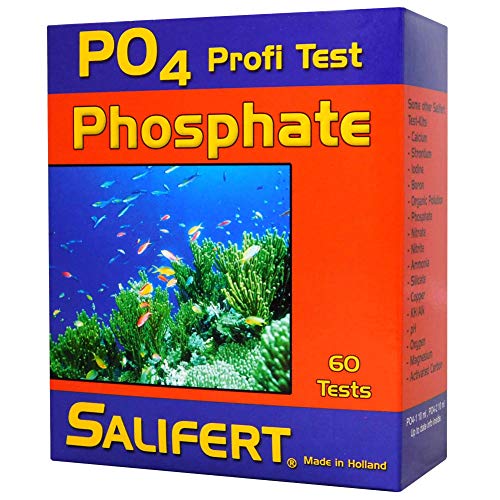
Top | Salifert Phosphate Test Kit | 60 Tests | 0-3.0 ppm | Buy Now |
 Top
Top Top
Top | Seachem MultiTest Phosphate Test Kit | 75 tests | 0-3.0 ppm | Buy Now |
 Top
Top Top
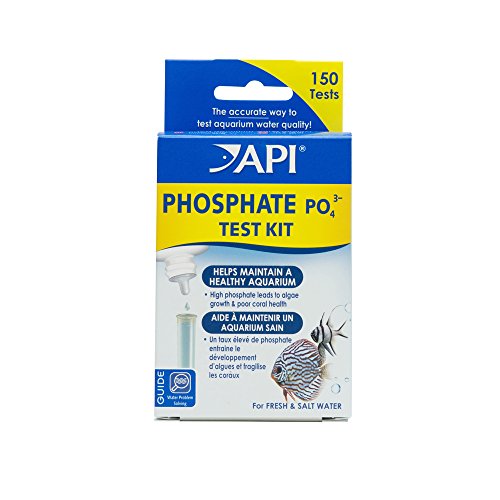
Top | API Test Kit | 150 tests | 0-10.0 ppm | Buy Now |
 Top
Top Top
Top | NYOS Phosphate Test Kit | 50 tests | 0.025-1.0 ppm | Buy Now |
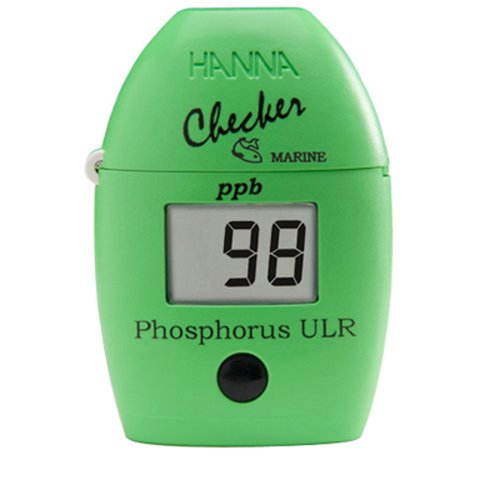
- Number of Tests: 6 tests
- Test Range: 0-200 ppb
- Large LCD screen for readability
- Auto shut-off to prolong battery life
Product Overview
Let’s introduce you to our top choice, the HI736 from Hanna Instruments. Once you keep on reading, you’ll gradually find out why this one is good.
The company does claim it to be the most accurate, and we can’t disagree with this one. On top of that, the whole contraption looks legit.
But you should know that the best one on the list doesn’t come without flaws. And this one does have a few of those. But testing this out felt like a breeze.
The cool-looking green exterior sets it apart from the others on the list. We had a ton of fun with this one while conducting the tests. But the problem is that it’s not too cheap.
Although it’s not too affordable, this is a much simpler option than to match colors with a piece of paper, right?
I mean, guessing the color from the chart is easy if you’re a professional. But if you’re new to reef tanks, this could be helpful.
But the amount you have to pay for every test is significantly higher than the others on this list. Luckily, the reagents that you need for future use are comparatively cheap.
Regarding the entire reading time, you need to wait for three minutes. But when you add in all the procedures to get things ready, it takes about 6 long minutes.
If you have prior experience in phosphate testing, you should know that it’s a lot. Usually, it takes about 4-5 minutes. So we’re deducting points for this.
When it comes to ease of use, it’s easy. But you will struggle to try to pour the reagent into the vial. The packets are pretty flimsy.
You need to hit the powder down and carefully pour it in. As long as you can master the art of pouring this, you should be good to go.
In terms of readability, the device seemed to be relatively foolproof. It gives you the exact reading.
Hanna products are usually packed well. And this one also came in a rigid plastic box. The checker is unique, which sets the product apart. Even the glass vials are durable.
So we can’t deduct points for durability in this case. But we can always penalize them for other things.
For example, you need to vigorously shake the vials for two whole minutes to mix the reagent. This is a total bummer.
Pros
- Provides accurate readings
- It comes with durable glass vials
- Stylish-looking checker
- Decent reading time
- Easy to use
Cons
- A bit on the expensive side
- You’ll struggle to pour the reagent
Product Overview
This test kit from Salifert occupies second place. And we’re about to put it to the test. You might think that we’re nitpicking, but that’s just how it is.
Firstly, you’ll be getting 60 tests for an affordable price. We can’t complain about the pricing. That’s because we’ve included more expensive options on the list.
The best part? This is by far the fastest test kit on the list. You’ll get the results in just a couple of minutes. There isn’t even any waiting time after adding the other reagent.
So, we were pretty impressed about this. That is, of course, we got the results. Regarding accuracy, we can say that you have better options.
The higher-end levels of phosphate can be very tricky to read. When you’re trying to read among 0.5, 1.0, and 3.0 ppm, the color shading is quite similar. So you better keep that in mind before buying.
But it’s pretty easy to use. The instructions are clear, and you can probably follow them step by step, even if it’s your first time.
Some vials need you to put a cap on as they need to be shaken. You don’t even need to shake the vial for this one. So they didn’t even bother to include a cap.
When it comes to the quality, well, we can say that the vials could’ve been better. They’re made out of cheap plastic, and they look quite cheap when you compare them to the glass vials of the other choices on the list.
Pros
- Quite an affordable choice
- Fast reading time
- Moderate readability
- Very easy to use
- No waiting time at all
Cons
- Flimsy test kit
- Cheap plastic vial

Product Overview
In third place, we have this test kit from Seachem. The pack looks like any other fish tank test kit pack. But we’re going to give you the details.
Search test kits don’t have a lot of things going on for them. And we don’t think this one will be enough to impress you either.
But it’s not all bad news. There are a couple of things that might sway you towards this one. So let’s talk about it.
You get 75 tests. So that’s a lot for the price. That’s why we have to give this kit a win in the affordability section.
Regarding reading time, this kit from Seachem is just as good as the Salifert one. You can finish the test in just a few minutes, just like the previous one on the list.
In terms of usability, we found this pretty simple. They give you a couple of contraptions to perform the test.
You must use the pipette and fill the oval in the plastic tray. Then you have to add a couple of different reagents.
After you stir the reagents, the test is done. Then, you just have to wait to read the results. This is where things get frustrating. We can label this as a pretty difficult-to-read test.
The paper reader is super flimsy. You might not get a very close match at all.
And in terms of quality, the tray gets stained quite fast. You might even be able to break it.
Pros
- It’s very fast at reading
- It offers a lot of tests
- Simple to use
- In the affordable range
- Accurate readings
Cons
- Difficult to read
- Quite flimsy accessories
Product Overview
Before we move on to the final test kit, here’s the penultimate one. API is a pretty famous brand. So we have decent expectations from this one.
Once we decided to test it out, we found a lot of positives. And we got to see some negatives too.
Let’s start with the best part. You can’t get a cheaper test kit on this list. With decent quality, good affordability, and ease of use, this holds a place in our hearts.
But it has quite a few problems too. But we’re sure you won’t get 150 tests for any cheaper, at least on this list. If you’re concerned about the testing time, well, four minutes is pretty decent.
I mean, even the first one on the list takes a longer time. And if you’re counting the waiting time, that’s around three minutes.
As most of the phosphate test kits are simple to use, the components matter. And the vial that comes with this test kit is kind of tippy. You might accidentally knock it over.
It’s also unnecessarily tall, so you might need an extra set of hands when testing the levels with this one.
When it comes to readability, we have a couple of complaints. It’s not the hardest test kit to read, but it’s far from easy. But most of the blame goes to the card.
You have to hold the vial up against the white part of the card. And if you hold it just a little bit farther, you will most likely get different readings.
Another annoying thing about the kit is the colors of the first three ppm levels. From 0.25 to 1.0ppm, the shades of green are pretty similar.
So you might have difficulty matching the color inside the vial with the card.
So, deciding the accurate ppm level should also be a bit tricky.
In terms of durability, the cardboard chart is rather flimsy. But you shouldn’t have to be too worried about that. You’ll only need to hold your vial up against it.
When it comes to the vials, the glass is tough enough. So the overall durability is moderate.
Pros
- Very fast readings
- Super affordable
- Can offer a high number of tests
- Simple to configure
- Accurate test results
Cons
- Color confusion on the card
- The glass vial is a bit tippy
Product Overview
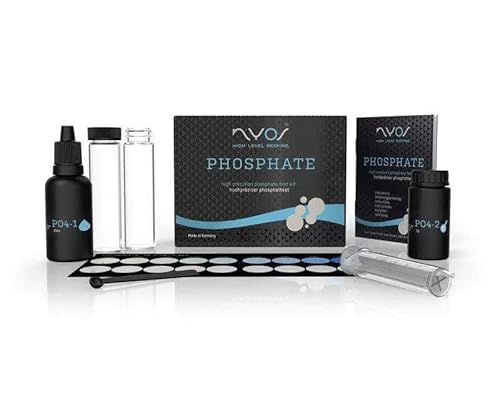
Coming in last place is this one from Nyos. This blacked-out design looks pretty nice from the outside. But we had to test out the practicality of the test.
We’ll start with a complaint on this one. Because although we liked it, we found them to be on the expensive side.
The biggest problem with this one is that Nyos doesn’t sell the reagents separately. So you have to buy the entire test every single time you run out. This is a pretty big bummer.
We were pretty hopeful about this one. That is, until we put it to the test. And we’re not going to lie! We were kind of disappointed.
The waiting time of ten minutes is a huge turn-off. And if you add in the preparation time to put things together, you must spend 12 minutes.
When it comes to ease of use, we had no complaints. Just fill the vials up and add the reagents. You don’t have to shake it for too long. And then the long waiting game begins.
In terms of readability, we found a unique-looking card. It’s different in design. But we still can’t appreciate that they only allow you to read up to 1.0 ppm.
So if you want to read above that, you’re out of luck. But we have to admit that the coloration difference is notable. That’s a bit of an improvement over the fourth one on our list.
If you’re interested in durability, we got you covered. Although the packaging isn’t something to write a song about, the vials are strong.
That’s right; these vials are the thickest on the list, so you can expect them to hold their shapes on light impact. The overall durability is pretty moderate.
Pros
- Durable glass vials
- Easy to read
- Simple to use
- Decent design for newbies
- Meets safety standards
Cons
- A bit on the pricier side
- Prolonged reading time
Buying Guide
Now that we’ve got the reviews out of the way, it’s time for you to buy one, right? Well, wrong! I mean, you can still go on and make your purchase.
But these factors to consider before buying a test kit should help you out.
Should be Affordable
First things first! You’ve got to think about the price of the test kits. When it comes to putting these kits to the test, the cost per test counts.
You need to get a lot of tests done in a bit of time. So going for a test kit that allows you to do a lot of tests is essential.
Even though the top choice on our list isn’t the best value-for-money option, you can still get cheaper reagent packets.
So keep that in mind when you’re shopping for phosphate test kits.
Lower Reading Times
Test kits and waiting times are two things that don’t want to add up. While some non-branded cheaper options take a lot of time to read the ppm results, most shouldn’t take that long.
The kit you ordered must test the phosphate quickly. You might have to move on to another vial right away.
So in these circumstances, you need a fast reading time.
The waiting time is more annoying at times. You put all the things together, follow the instructions and wait. But that’s something technology hasn’t been able to solve just yet.
So we all need to wait a bit longer to find accurate results. Usually, all the checkers take 3-4 minutes to show results.
Ease of Use
You will not be impressed with the kit if they aren’t intuitive. Most kits have great information about the usage. They’ll tell you how to use them exactly as recommended.
So you shouldn’t have much trouble trying to use these kits.
Readability is Key
You need to be able to read the test results, right? I mean, what’s the point of the whole test if you don’t know what you’re looking for?
Luckily, most companies stick to the conventional way. They use the graphical laminated card with different colors indicating different phosphate levels.
In most cases, you’ll have to match the colors with the color of the solution in the vials. And if you get the digital one from Hanna, you get accurate information on the screen.
Quality and Durability
Unless you want to use these kits for a long time, the durability shouldn’t matter. With that said, the testing vials should be made with solid glass.
That’s because they are the intricate part of all the kits. And they’re used because they work well. So you won’t want your vials to break.
Almost all the products on the list come with good-quality glass vials. Even though you get cheaper cards with some of them, it’s not all bad.
FAQs
Question: How much should my phosphate level be in my aquarium?
Answer: Usually, if the phosphate level is below 0.05ppm, you can call that an acceptable range.
Question: Can I lower the phosphate content inside my aquarium?
Answer: Yes. You can lower the phosphate level by changing the water source, the food, or the water itself.
Question: Will phosphate kill my fish?
Answer: Although the lower levels aren’t that harmful, you have to watch out for the high levels.
Conclusion
And, with that, our take on picking the best phosphate test kit comes to an end. If you’ve gone through this, you probably already have a good idea about what you should buy.
But the thing is, you can’t go wrong with any one of these. So, compare the features and pick the one that suits your budget.
